Fall is a season that brings cooler temperatures and a cozy, comforting atmosphere. It’s a time when people often turn to baking to celebrate the season’s flavors and create warm, inviting spaces at home. ?
Baking in the fall typically features ingredients like apples, pumpkins, and spices such as cinnamon, nutmeg, and cloves. Classic recipes include pumpkin pies, apple crisps, and pecan pies. These baked goods often bring on the feeling of autumn with their rich, spiced flavors.
All things pumpkin spice seem to be the star of the season. And I don’t mind it. However, there are other fall flavors that we do not give credit to, like Maple.
Maple isn’t just for drizzling over your morning pancakes—it has a rich, warm flavor, deep color, and enticing aroma.
Honestly, I hadn’t given maple much thought until our friends, who run a coffee food truck, introduced me to the concept of a maple latte. They wanted a unique garnish and suggested a mini cookie. They asked if I could whip one up, and of course, I was eager to help.
It took me two attempts, but I finally succeeded. I started with my simple butter cookie recipe and adjusted the measurements to highlight the delightful essence of maple. While I made some mini cookies specifically for the latte garnish for my friend’s lattes, I also crafted a larger size that anyone can make during this season.
And I just want to add…get ready for your home to be filled with the warm, inviting aroma of maple.


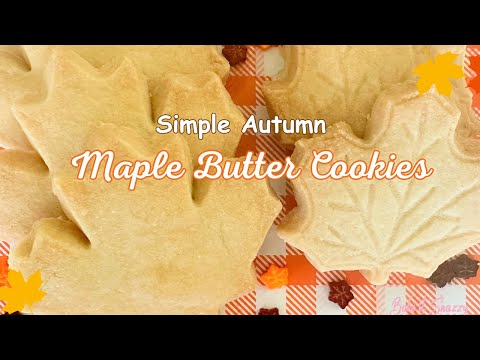
Maple Butter Cookies
Description
Ingredients
Instructions
-
In a bowl of a stand mixer with the paddle attachment (or medium-sized bowl if using a hand mixer) add the butter, powdered sugar, and maple extract and mix on medium speed until creamy. You may have to stop the mixer and scrape the sides of the bowl a couple of times.
-
Stop the mixer and add half of the flour. Mix on medium-low for a few seconds then up to medium high until flour is well combined.
-
Stop the mixer, and scrape the sides of the bowl. Add remaining flour, mix on medium-low then medium-high flour is well incorporated.
-
Once flour is well incorporated, stop the mixer and scrape the sides of the bowl bringing the dough together with your spatula. Place the dough on plastic wrap and knead gently and make a ball of dough, pat it gently to flatten into a disc. Then place it in the refrigerator to chill dough for about 30 minutes.
-
After 30 minutes preheat oven to 350°. Also have some flour handy, a rolling pin, cookie cutters and line a cookie sheet with parchment paper.
-
Remove the dough from the refrigerator, dust your work surface, and rolling pin with flour.
-
Unwrap the dough and place it on your floured surface. Roll dough approximately ¼" thick.
-
Cut the dough with the cookie cutter of your choice and place it on the prepared cookie sheet (see *alternative if not using a cookie cutter).
This recipe make approximately 15-20 cookies depending on the size of the cookies. -
Repeat rolling, cutting, and flour surface or rolling pin as needed.
-
Place the cookie sheet in the refrigerator for about 10-15 minutes (This helps keep the shape of the cookie when baking).
-
Remove from refrigerator and place in the preheated oven and bake for 10 minutes.
-
After 10 minutes check the cookies and rotate them if necessary and bake for another 3-5 minutes. (cookies are done once they reach golden brown around the edges).
Keep adding time in small increments of 2-3 minutes, if necessary, until they reach the golden brown edges. Also keep in mind the size of the cookie may vary baking time.
-
Remove from oven and let them cool in the pan for 15- 20 minutes. Then transfer them to a cooling rack and let them cool completely before decorating or **storing them.
Go to Easy Decor for Maple Butter Cookies when you are ready to decorate!
-
*Alternative without a cookie cutter
- Prepare a cookie sheet with parchment paper
- Scoop approximately 1 oz of dough. (you can use a small cookie scoop or weigh out 1 oz.)
- Roll into a ball and place it on the prepared cookie sheet.
- Gently press down with your index and middle fingers.
- Continue until you have scooped and pressed all the dough.
- Preheat oven to 350°.
- Place cookie sheet in the refrigerator for about 10-15 minutes
- Continue with steps 11-13.
-
**Storing
These cookies have a long shelf life. To keep them fresh, place cookies in an airtight container or well-packaged once they are completely cool. These cookies are buttery with a slight crisp to them. If stored too soon, it will lose its texture and can become soft reducing its shelf life. Cookies can be stored at room temperature for up to 2 weeks (do not place your baked cookies in the refrigerator).
For longer storage and preserve freshness you may freeze your cookies.
- Place your baked and completely cooled cookies in a freezer Ziploc bag squeezing out as much air and seal the bag.
- Place the freezer bag in a freezer-safe container making and secure the lid.
- Place in the freezer for up to 3 months.
- When ready to enjoy, remove the container from the freezer and place it on your counter. DO NOT OPEN LID.
- Let the cookies come to room temperature completely before opening the container and freezer bag.
(If you open lid/freezer bag too soon, the condensation will ruin the texture of the cookies. You need to be sure to let them come to room temperature before opening.
To enjoy cookies without having to remove the entire container of cookies, I suggest you package them individually before placing them in the freezer bag and container.
When ready to enjoy, remove from the container the packaged cookies you want to enjoy, place the packaged cookies on the counter, and let them come to room temperature before removing them from the package.